So, if Windows fails to locate your files or shows incomplete results, the indexing process may have paused. If you’ve been bothered by a similar issue yourself, we’ve prepared a list of 7 working solutions that should help you fix the indexing tool on Windows 11. So, let’s check them out.
1. Restart Windows Search Service
Windows Search service is an essential program responsible for indexing content and providing search results. If there’s an issue with that service, the indexing process will be interrupted. So, first, you should try restarting the Windows Search service to see if that helps. Step 1: Press the Windows key + R to launch the Run command, type in services.msc, and press Enter.
Step 2: In the Services window, scroll down to locate Windows Search. Right-click on it and select Restart from the menu.
If the service is not running, choose Start.
2. Enable Search Indexing on Low Battery
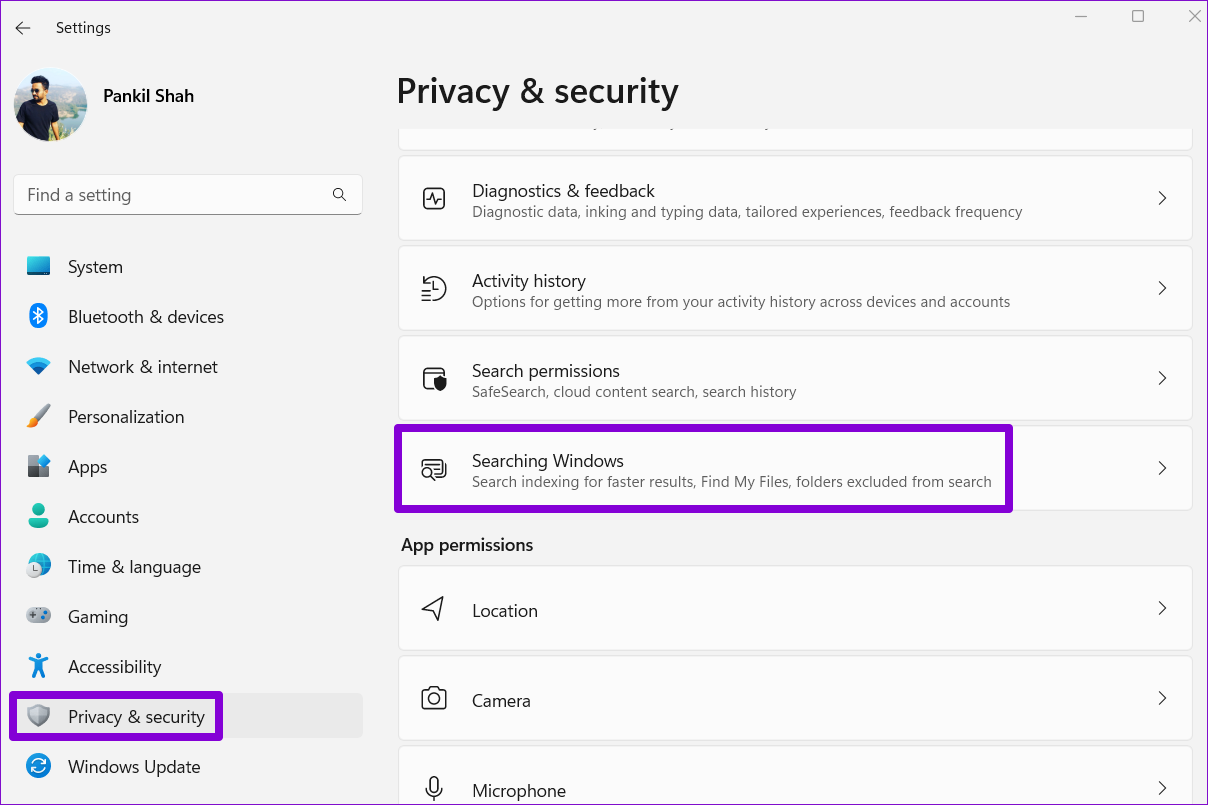
When your Windows laptop is low on battery, it may suspend some of the background processes like search indexing. And sometimes, these activities may fail to resume even after connecting your laptop to a power source. To avoid this, you can configure the indexing tool to ignore the power settings on Windows. Here’s how. Step 1: Press Windows key + I to launch the Settings app. Step 2: In the Privacy & security tab, select Searching Windows.
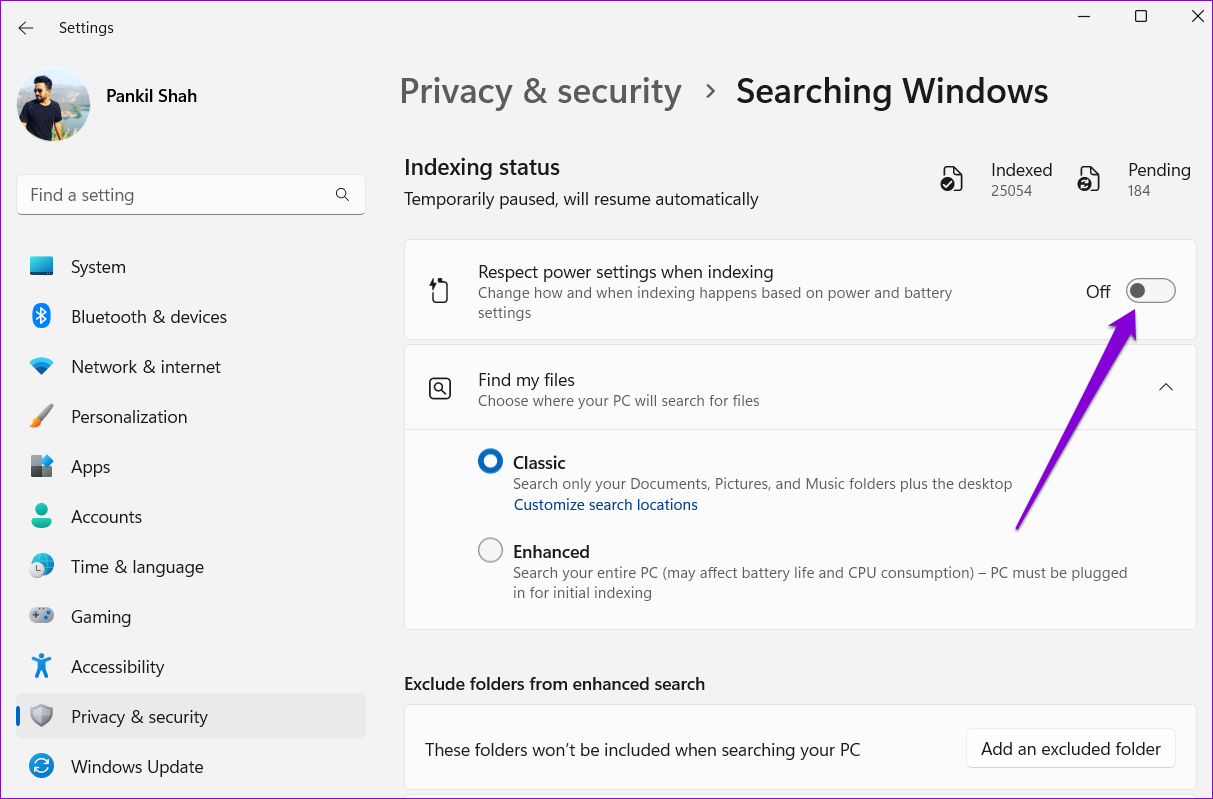
Step 3: Toggle off the switch next to ‘Respect power settings when indexing.’
3. Run Search and Indexing Troubleshooter
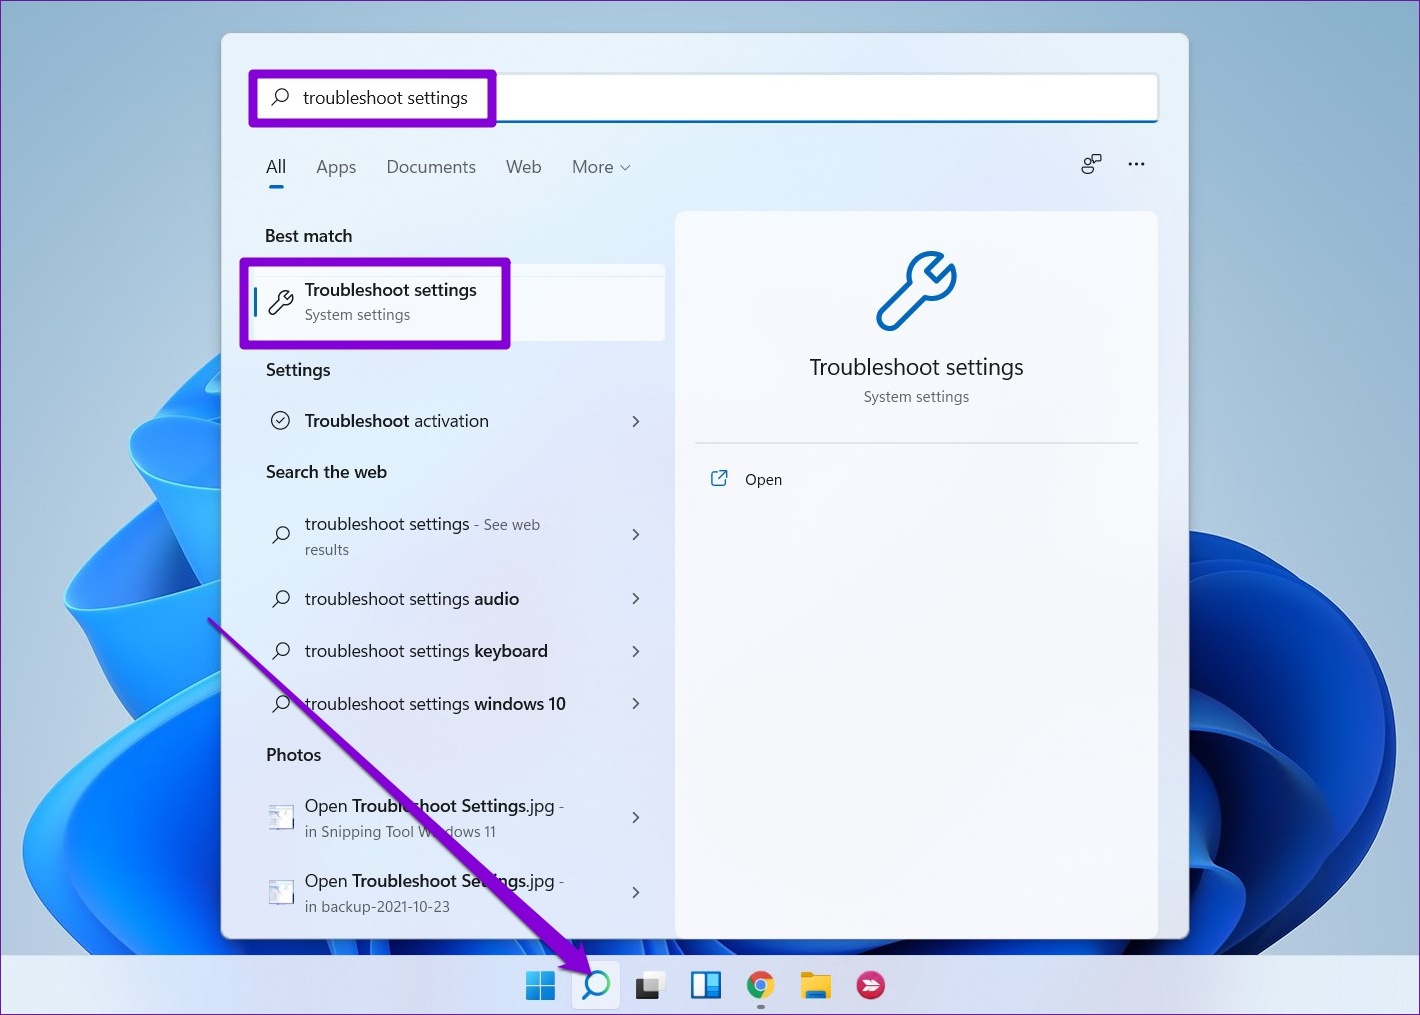
Windows carries several troubleshooters that can assist you with most problems on your PC. One of them is the Search and Indexing troubleshooter that you’ll need to use for this problem. Here’s how to use it. Step 1: Click on the search icon on the Taskbar, type in troubleshoot settings and press Enter.
Step 2: Click on Other troubleshooters.
Step 3: Scroll down to locate Search and Indexing. Click the Run button next to it to begin troubleshooting.
After that, follow the on-screen instructions and allow Windows to fix any potential issues.
4. Run SFC and DISM Scan
Corrupt or missing system files can also interrupt the indexing process on Windows. If that is the case, running an SFC (or System File Checker) scan will help you restore those system files with their cached versions. Step 1: Press Windows key + X to access the Quick Link menu and select the Windows Terminal (Admin) option from the list.
Step 2: Paste the command mentioned below and press Enter.
After the scan is complete, a message will appear on the screen. If the tool fails to find any irregularities with the system files, you’ll have to run the DISM (or Deployment Image Servicing and Management) scan on your PC. Launch Windows Terminal with admin rights, run the following commands, and press Enter after each one.
After scanning the files, the tool will connect to the Microsoft server online to download and replace damaged files if required.
5. Rebuild Search Index
If the above solutions don’t work out, the search index library on your PC has likely become corrupted or inaccessible. As a result, the indexing process has paused on Windows. In that case, your only option is to rebuild the index from scratch. Note that this process can take anywhere from a few minutes to several hours, depending on your system and the amount of data. Step 1: Press Windows key + I to launch the Settings app. In the Privacy & security tab, select Searching Windows.
Step 2: Scroll down to click on Advanced indexing options.
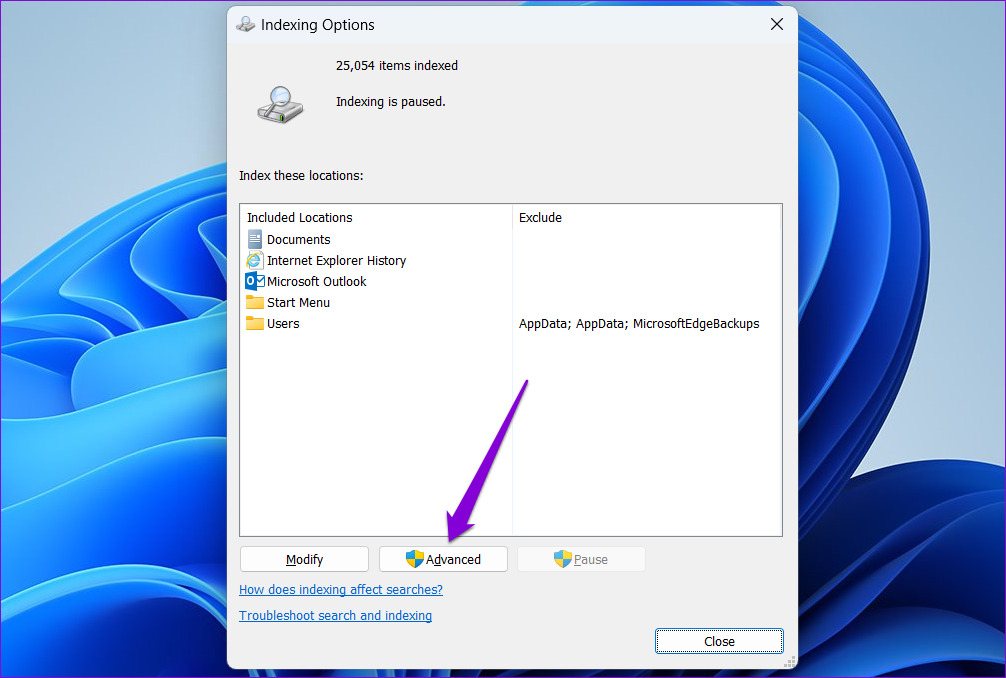
Step 3: Next, click on Advanced.
Step 4: Lastly, hit the Rebuild button under Troubleshooting.
After the process is complete, the indexing tool should work as before.
6. Tweak Registry Files
Several users managed to fix this issue by preventing Windows from indexing Outlook files. You can also give it a shot. You’ll have to tweak the registry files on your PC to do so. Since Registry Editor contains important settings for Windows and its apps, it’s recommended that you back up the registry files before proceeding with the steps below. Step 1: Press the Windows key + R to open the Run dialog. Type in regedit and press Enter.
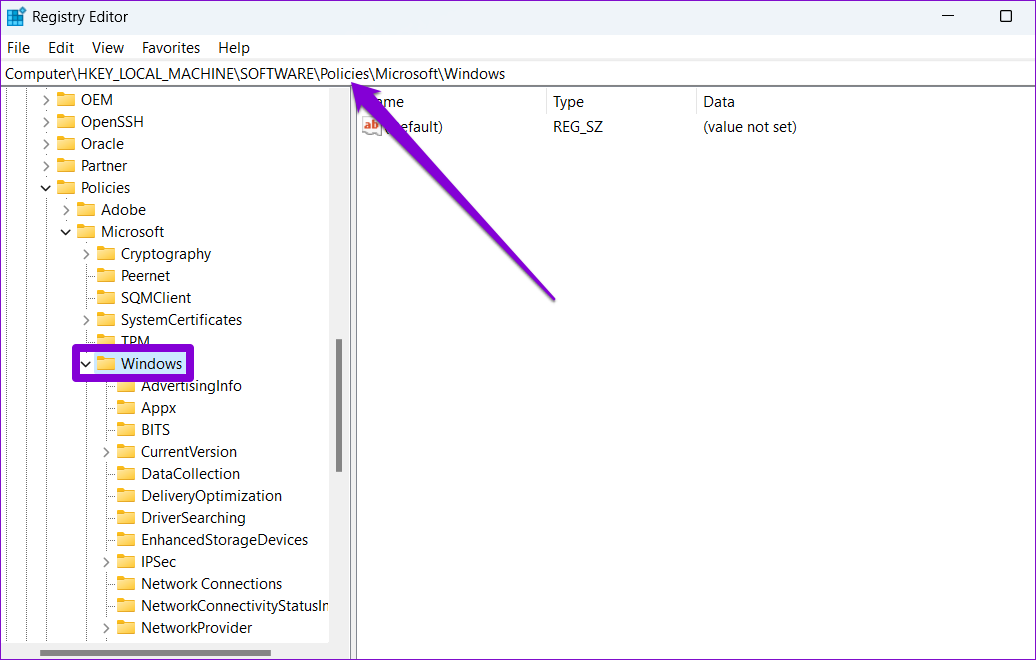
Step 2: Use the address bar at the top to navigate to the following key:
Step 3: Right-click on the Windows key, go to New and select Key. Name it Windows Search.
Step 4: Right-click on the Windows Search key, go to New and select DWORD (32-bit) Value. Name it PreventIndexingOutlook.
Step 5: Double-click on the newly created DWORD and change its value data to 1. Then hit OK.
Exit Registry Editor and reboot your PC to apply changes. Check to see if the issue is resolved.
7. Run System Restore
A recent change in the system settings or a firmware update may have led to such indexing issues on Windows. If you can’t figure out the exact cause, you can undo those recent changes by performing a system restore. Step 1: Open the Start Menu, type in create a restore point, and press Enter.
Step 2: Under the System Protection tab, click on the System Restore button.
Step 3: Use the recommended restore point or pick one yourself by choosing the second option. Then hit Next.
From there, follow the on-screen instructions to perform a system restore.
No More Pauses
Indexing the contents of your PC allows Windows to locate your files faster. However, just like most things on Windows, the indexing tool can also stop working at times. Hopefully, one of the above solutions has fixed any issues with Windows Search Index, and things are back to normal. The above article may contain affiliate links which help support Guiding Tech. However, it does not affect our editorial integrity. The content remains unbiased and authentic.


