When Windows Update displays the ‘Some update files are missing or have problems’ error on your Windows 11 PC, you may see various codes such as 0x80070003, 0x8007000d, 0x80073712, and 0x80070570, with it. We will look at five effective troubleshooting methods for resolving this annoying error. So, let’s start.
1. Run the Windows Update Troubleshooter
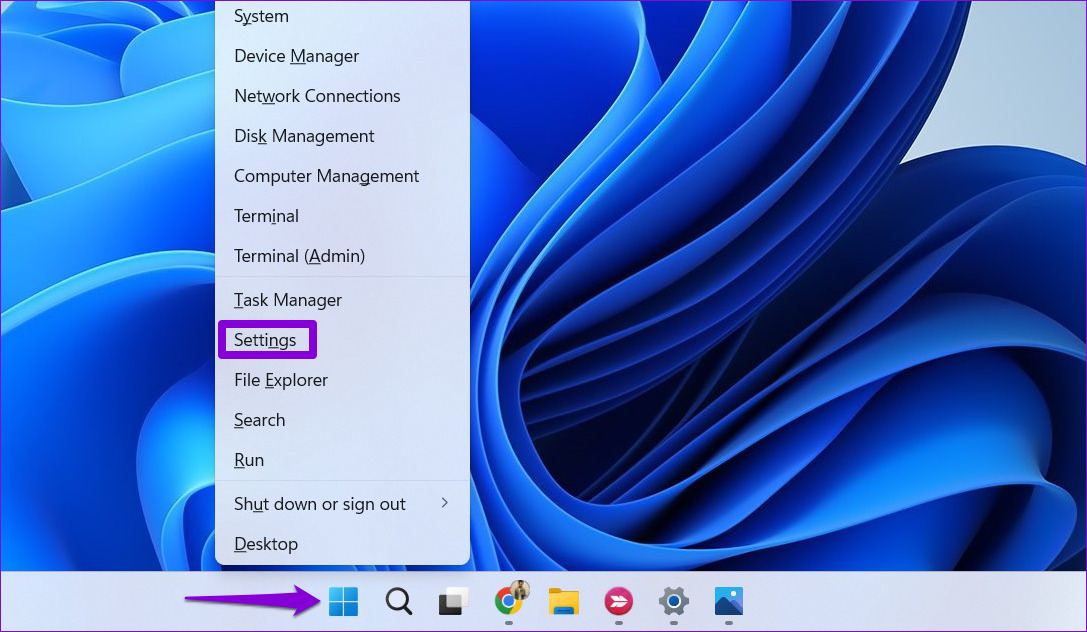
Windows 11 includes a dedicated troubleshooter to automatically identify and resolve any common issues with the Windows Update process. So, it’s a good idea to run the Windows Update troubleshooter first. Step 1: Right-click on the Start icon and select Settings from the list.
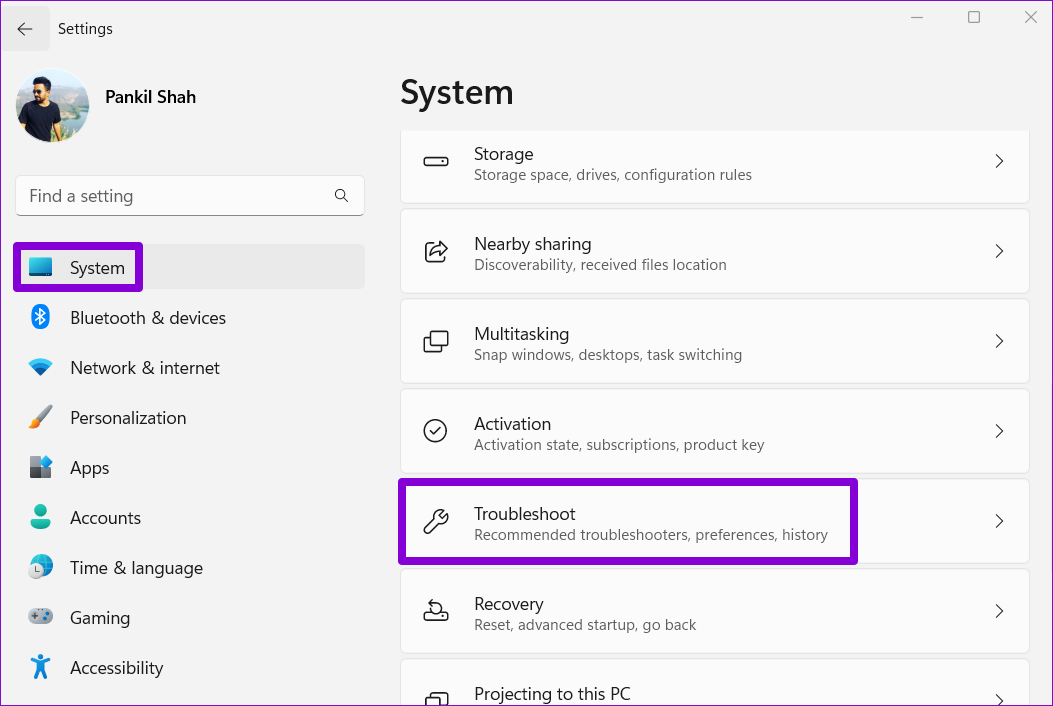
Step 2: In the System tab, click on Troubleshoot.
Step 3: Click on Other troubleshooters.
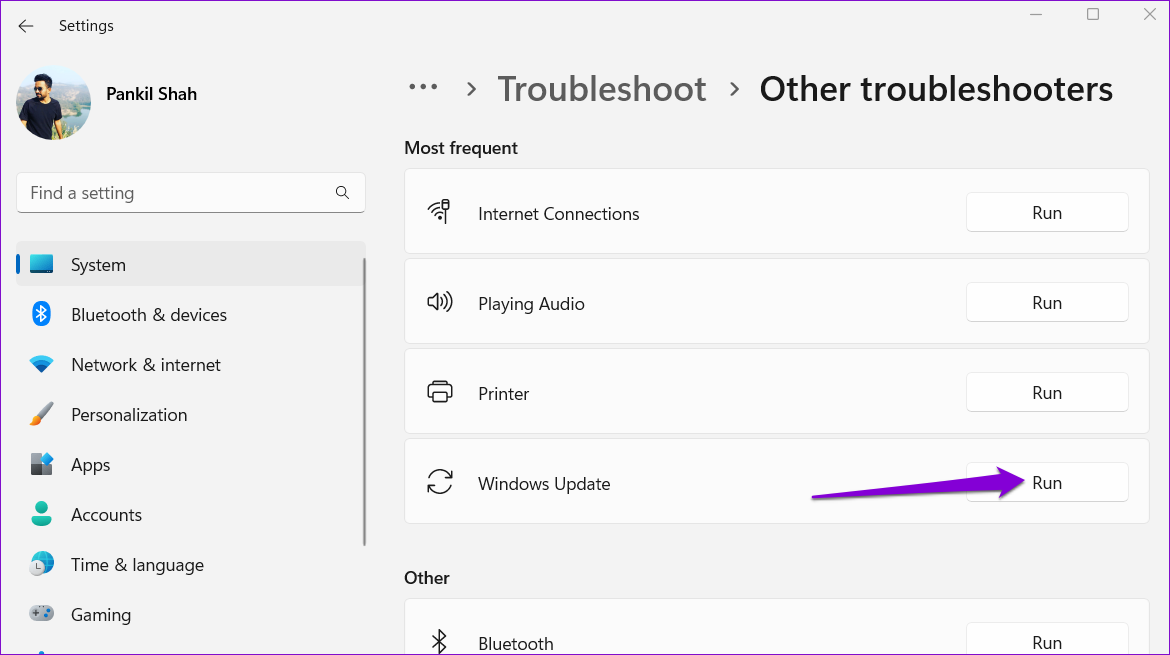
Step 4: Click the Run button next to Windows Update.
The tool will start scanning your system for any problems. If it finds any problems, it’ll diagnose and fix them. After that, try to install the Windows updated again.
2. Delete Existing Update Files and Restart Windows Update Components
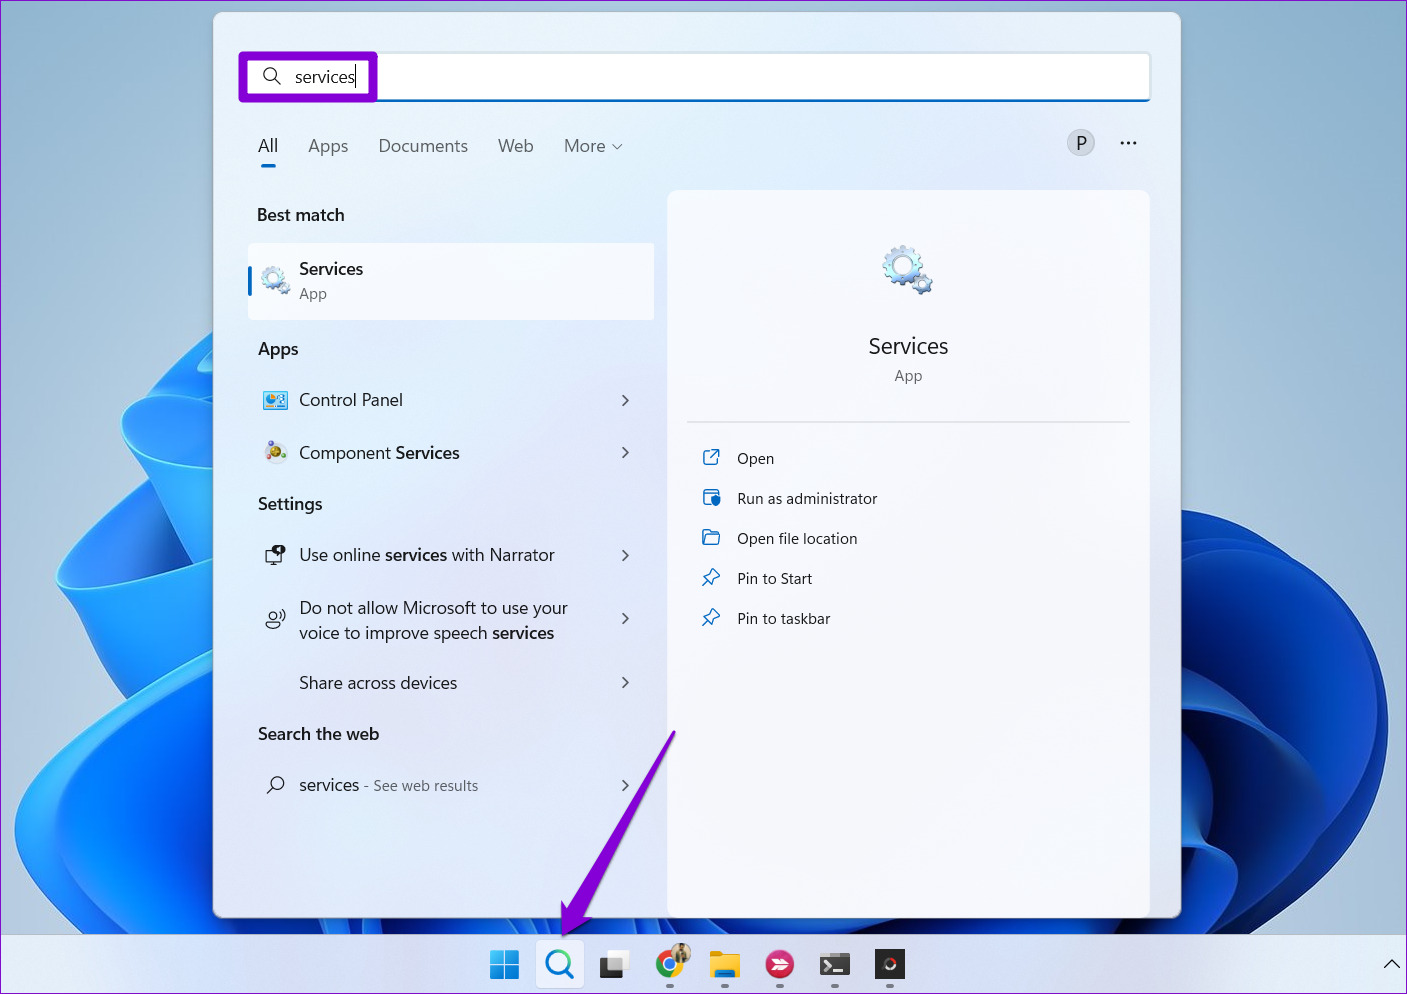
Windows stores all the update files in the SoftwareDistribution folder before installation. If some of the update files are missing, you’re likely to encounter such errors. But before you start downloading the updates again, you can delete the existing update files first. And then restart downloading the Windows update to see if that helps. Step 1: Click the search icon on the Taskbar, type services in the box, and press Enter.
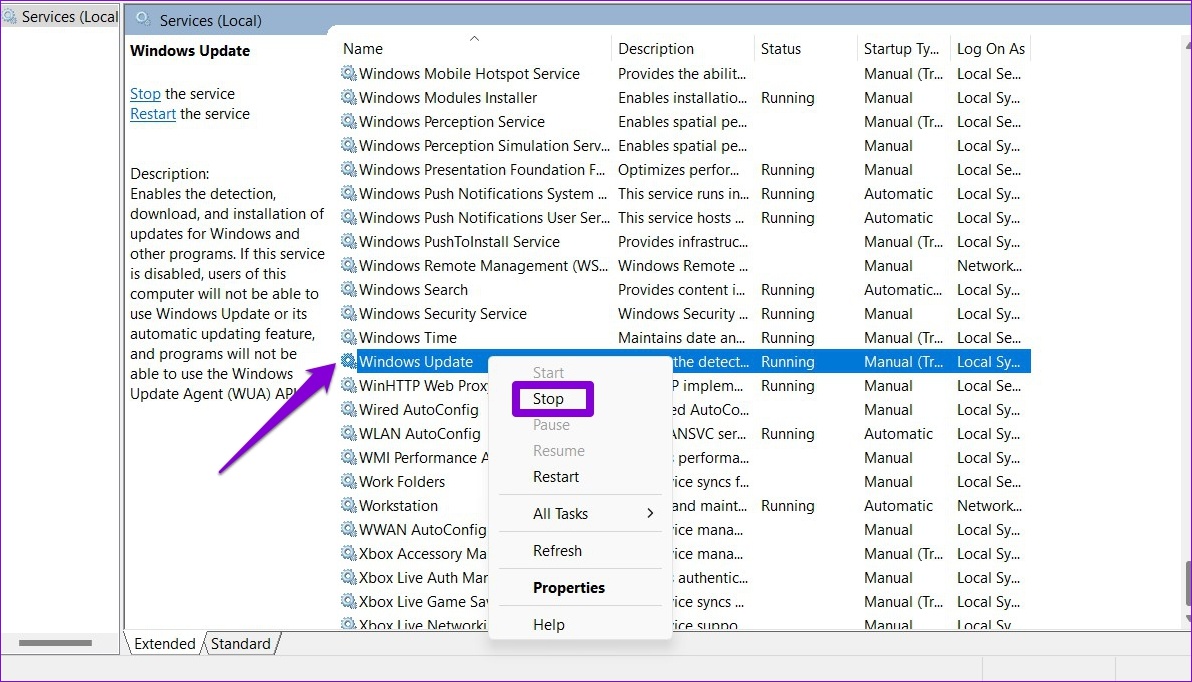
Step 2: In the Services window, locate the Windows Update service. Right-click on it and select Stop.
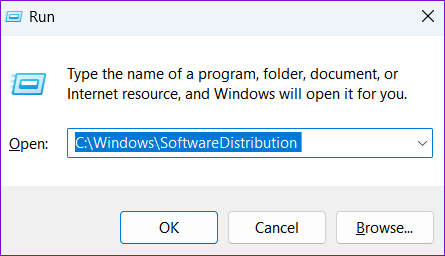
Step 3: Repeat the previous step to disable three more services – Cryptographic Services, Background Intelligent Transfer Service, and Windows Installer Service. Step 4: Press the Windows key + R to open the Run dialog box. Paste the following path in the Open field and press Enter:
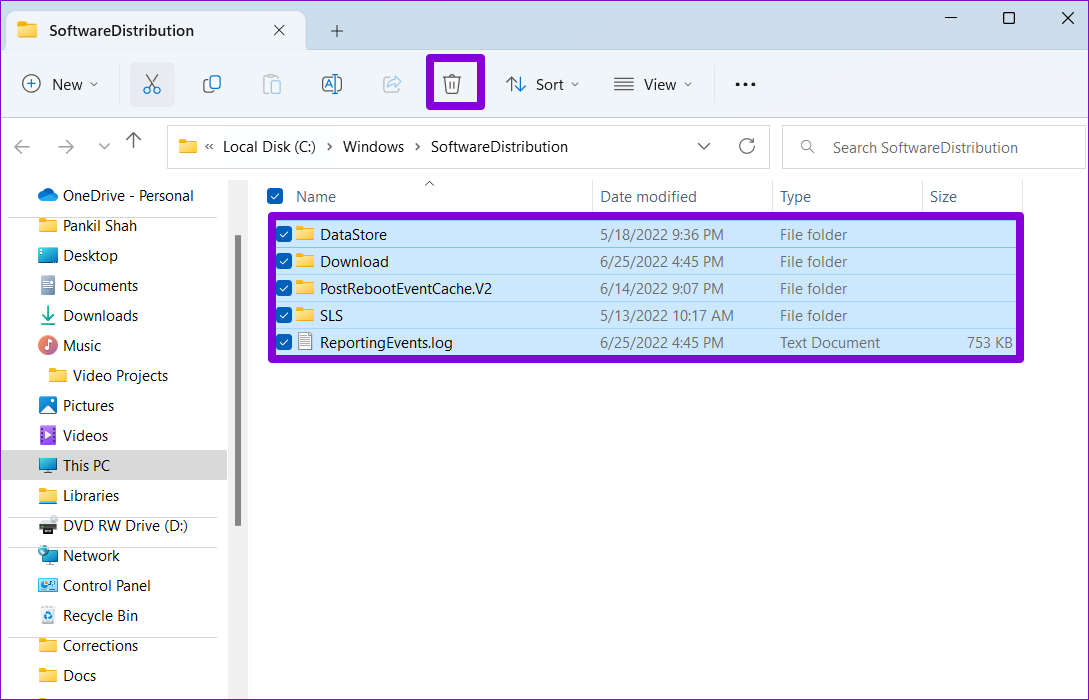
Step 5: Select all the files in the SoftwareDistribution folder and click the trash icon at the top to delete them.
Step 6: Return to the Services window. Right-click on the Windows Update, Cryptographic Services, Background Intelligent Transfer Service, and Windows Installer Service to start all four of them again.
After this, open the Settings app and head to the Windows Update section to download and install the pending updates.
3. Scan Your Computer for Corrupt System Files
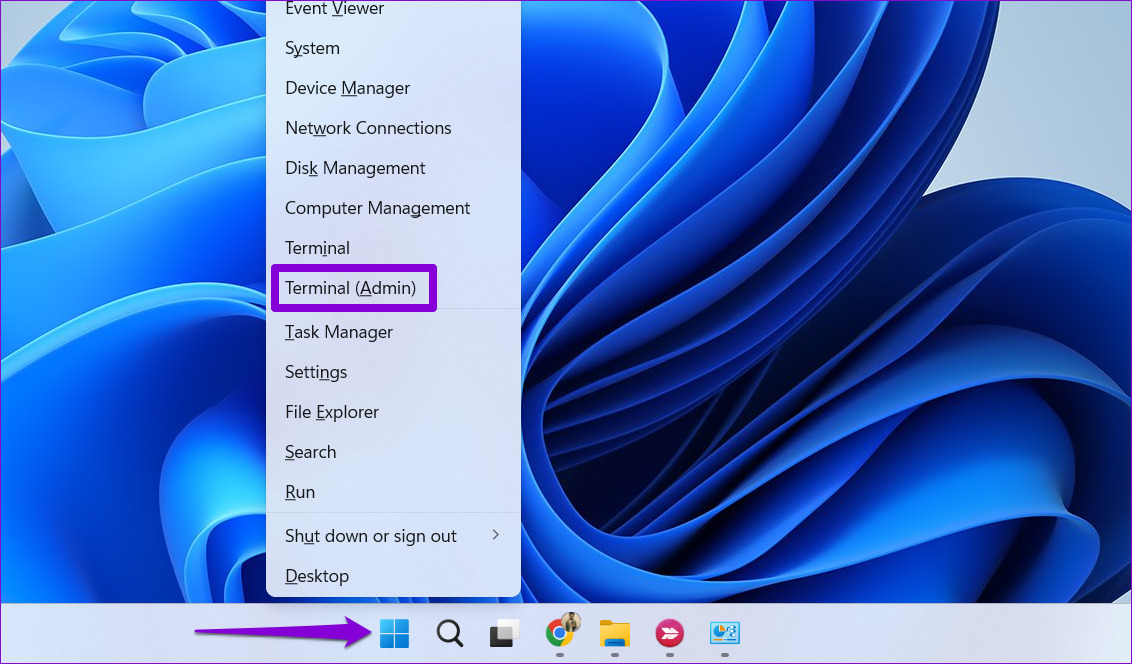
Corrupt system files on your computer can also give rise to the ‘Some update files are missing or have problems’ error. You can run the SFC (System File Checker) scan to check your computer for any damaged system files and repair them. Here’s how: Step 1: Right-click on the Start icon and select Windows Terminal (Admin) from the list.
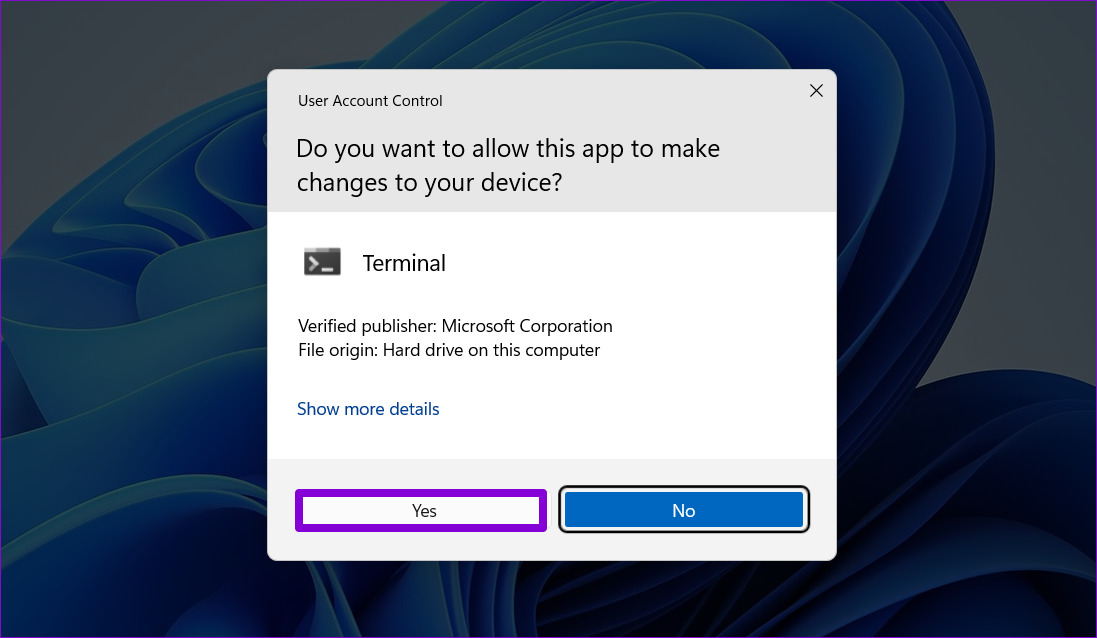
Step 2: Select Yes when the User Account Control (UAC) prompt appears.
Step 3: Paste the following command in the console and press Enter.
After running the above command, you’ll see a message conveying if the SFC scan found any issues. If there are any problems, the window will suggest options to repair the files. Otherwise, you’ll see the text – Windows Resource Protection did not find any integrity violations. Next, you need to run the DISM (Deployment Image Servicing and Management) scan For that, run the following commands in the Terminal window and press Enter after each one:
After the scan is complete, restart your PC and try to install the update once again.
4. Install Windows Updates in Clean Boot Mode
Third-party programs and services can sometimes interfere with the Windows Update process and lead to such errors. To overrule this possibility, you can boot Windows in a clean boot state and then try to install the update again. Step 1: Press the Windows key + R to open the Run dialog box, type msconfig, and press Enter.
Step 2: Under the Services tab, mark the box that reads ‘Hide all Microsoft services’ box. Then, click the Disable all button.
Step 3: Next, switch to the Startup tab and click on Open Task Manager.
Step 4: Select a third-party app or program and click the Disable button at the top. Repeat this step to disable all third-party apps and programs.
Restart your PC to enter the clean boot state, and then see if you can install the Windows update successfully.
5. Download and Install the Update From Microsoft Update Catalog
Windows 11 updates are also made available on Microsoft Update Catalog online website. So, if you’re having trouble installing updates from the Settings app, you can download the relevant update file from Microsoft Update Catalog and install it manually. Here’s how. Step 1: Press the Windows key + I to open the Settings app and head over to the Windows Update tab. Make a note of the knowledge base number of the update you want to download, such as KB5015814.
Step 2: Open the Microsoft Update Catalog website in a browser tab. Visit Microsoft Update Catalog Step 3: Type the KB number in the search box and press Enter.
Step 4: Download the relevant update pack meant for your system.
Step 5: Double-click the downloaded MSU file and follow the on-screen prompts to complete the installation process.
Keep Windows Up to Date
Windows updates are critical to the overall health of the operating system. Hence, avoid letting errors like ‘Some update files are missing or have problems’ prevent you from updating your system. Hopefully, the solutions in this guide help you resolve the error and resume the Windows update process. The above article may contain affiliate links which help support Guiding Tech. However, it does not affect our editorial integrity. The content remains unbiased and authentic.






![]()


