Although UAC is an important security feature, Microsoft and even we don’t recommend disabling it. Unless you have a really good reason for that, you’ll only end up opening your computer to accidental changes on your computer. Let’s understand what User Account Control is and why it matters.
What Is User Account Control on Windows?
User Account Control (UAC) is a Windows Security feature that prevents apps and users from modifying the system without permission. Typically, Windows displays a UAC prompt when trying to install a new program, running apps as an administrator, or making system-wide changes. This way, Windows prevents potentially harmful programs and scripts from making unauthorized changes.
Ideally, you need not disable UAC on Windows, as it makes your PC vulnerable to malicious codes and apps that can easily make system-level changes on your computer. So disabling UAC isn’t a good idea, unless you know what you’re doing. If you need to disable User Account Control on Windows for any reason, here are the options you’ll need to apply.
1. Disable User Account Control From Control Panel
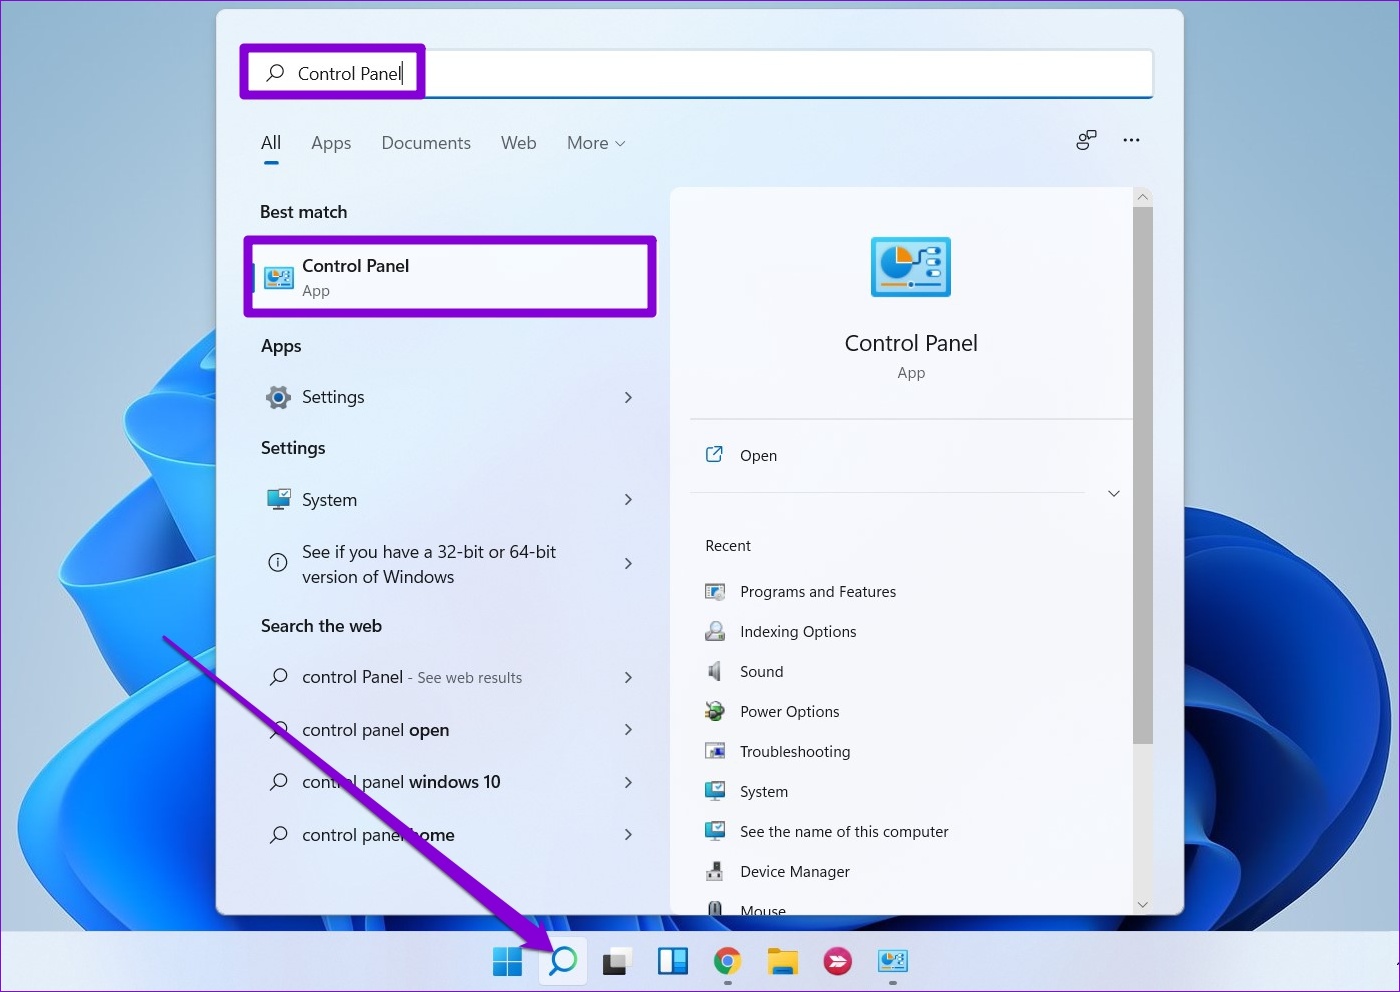
The most straightforward way to disable User Account Control on Windows is from the Control Panel. Of course, you can only do this if you are an administrator. Here’s how to go about it. Step 1: Click the search icon on the Taskbar, type control panel in the box and select the first result that appears.
Step 2: In the Control Panel window, use the drop-down menu in the top-right corner to change the view type to Small or Large icons. Go to User Accounts.
Step 3: Click on ‘Change User Account Control settings.’
Step 4: The UAC slider provides four different levels. As you move the slider, the description of each level appears in the box to tell how it affectsd your system. Drag the slider button to the bottom if you want to disable UAC and then select OK.
Step 5: Click Yes when the UAC prompt appears.
The change should take effect immediately, so there’s no need to reboot your PC. You can re-enable User Account Control at any time by repeating the above steps and dragging the slider to its default position.
2. Disable User Account Control From Registry Editor
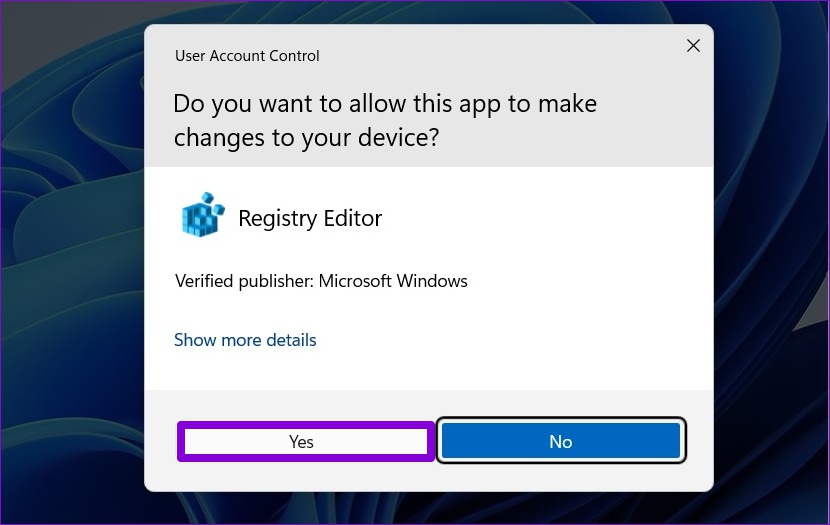
Registry files on your PC hold important settings for Windows and other third-party programs. If you’re tech-savvy enough, you can modify those registry files to disable User Account Control on Windows. However, you should use this method only if you are comfortable editing registry files. Also, take a backup all the registry files or create a restore point before proceeding with this method. Step 1: Press the Windows key + S to open the search menu. Type regedit in the box and select Run as administrator.
Step 2: Click Yes button on the User Account Control (UAC) prompt.
Step 3: Copy and paste the following path in the address bar at the top and press Enter to quickly navigate to the System key:
Step 4: Double-click EnableLUA string from the right panel. Change its Value data to 0 (zero) and hit OK.
Exit the Registry Editor window and restart your PC to apply the changes. After that, the User Account Control prompt will no longer appear on Windows 11.
3. Disable User Account Control From Group Policy Editor
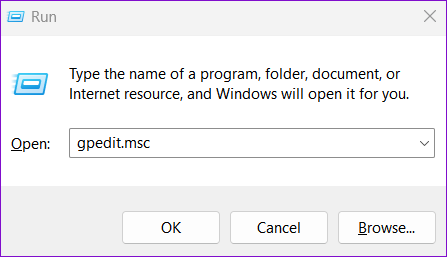
Like Registry Editor, you can also use the Group Policy Editor to make changes to your Windows 11 PC. However, it’s important to note that Group Policy Editor is only available on Windows Pro, Enterprise, and Education editions. So, if you’re using the Home edition of Windows 11, you’ll have to settle with the two methods listed above. To disable User Account Control via Group Policy Editor, follow these steps: Step 1: Press the Windows key + R to launch the Run dialog box. Type in gpedit.msc in the Open field and press Enter.
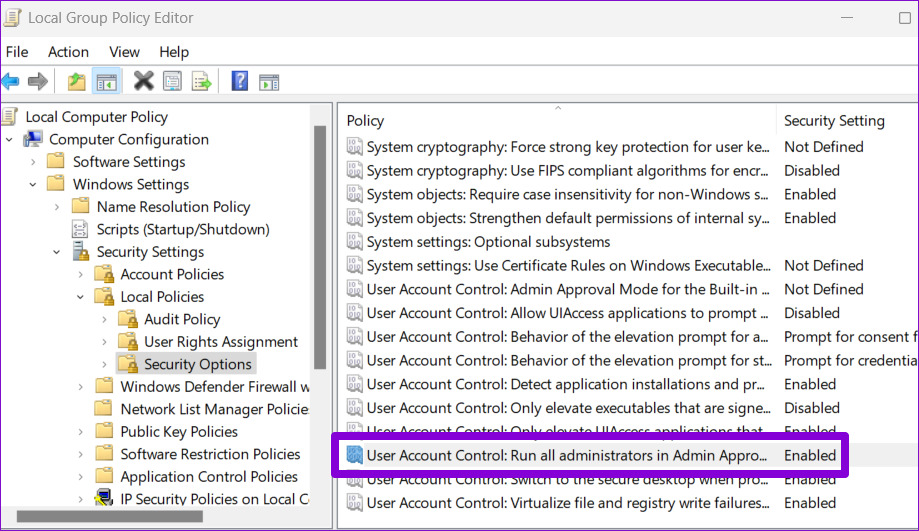
Step 2: In the Local Group Policy Editor window, use the left pane to navigate to the following folder.
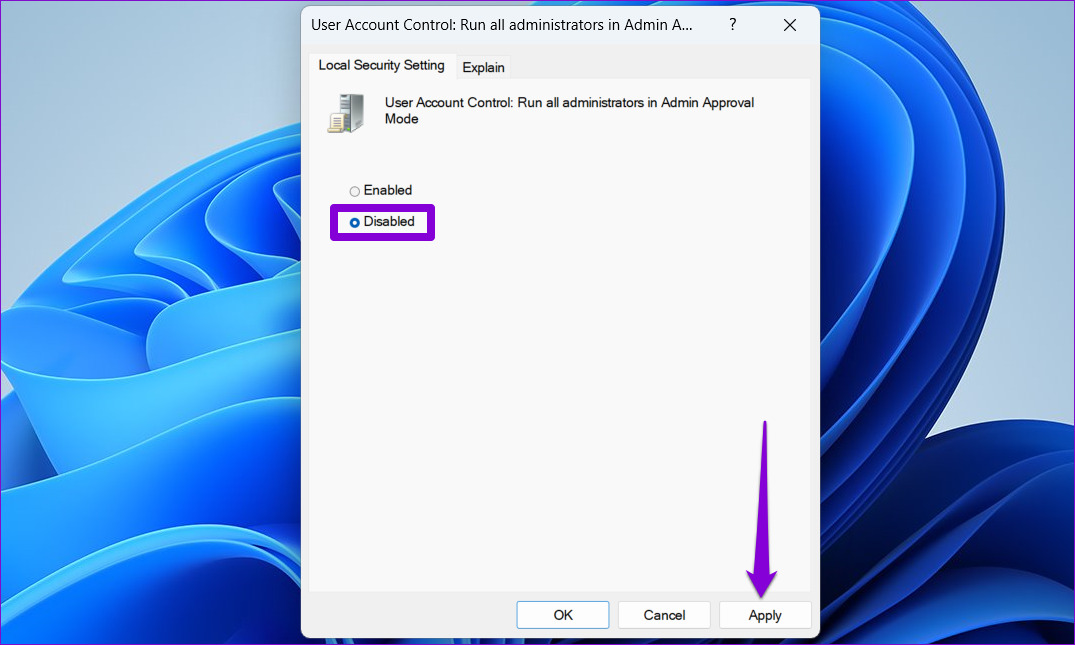
Step 3: Double-click the ‘User Account Control: Run all administrators in Admin Approval Mode’ policy on your right.
Step 4: Select Disabled and hit Apply to save changes.
Once you complete the above steps, Windows will not display a UAC prompt requesting your permission.
Better Safe Than Sorry
User Account Control is a vital security layer that comes pre-enabled on all modern versions of Windows. Disabling User Account Control is something that you should only do when necessary. The above article may contain affiliate links which help support Guiding Tech. However, it does not affect our editorial integrity. The content remains unbiased and authentic.