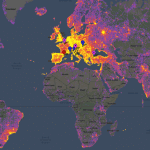
Don’t get it wrong here; it’s not a screenshot of a Google Maps. After you are done using this tool, you will find that it is stylized enough for you to qualify it with a ‘wow’. Map -> Image is a free web tool coded by Stamen Design, a design studio in San Francisco. And that’s the default place you spot when you land here. But you can very well fly to other places around the globe by plugging in a city or a town name (or a ZIP code for U.S. locations) in the Find a Place location bar on top. I love New York, so let’s try it out with that.
You can zoom in and out with the + and – keys. To fine-tune the map, set an image size that ideally corresponds to your monitor resolution. You can do this in the last step also, but I prefer to do it at first. The maximum resolution is 2000 pixels by 2000 pixels. An auto-detection here would have been useful. But no matter, let’s go ahead with setting up the map the way we want it. Notice the yellow frame in the center; you can position the map just the way you want it by using the frame like a viewfinder.
The ‘jazzing up’ is thanks to the Toner styles available under the dropdown. Choose your map style from the choice available. Try them all before you settle on one for your desktop. While you are experimenting with the toners, also shift the map around by changing the zoom levels for some interesting views. As the more you zoom in, the topography unveils more details like road grids and area plots which lend the map an interesting symmetry.
For instance, I love the cool blue effect I get when I use the Terrain-Background toner. Terrain-Lines are pretty good too.
But please note that not all toners are available worldwide, and so some are U.S. only. Finally, when you click on Make, a side panel comes out that shows you map is being processed. Click on the thumbnail to view it. You can use the permanent URL of the map to share it, or ignore that and download the map straightaway to your desktop.
Of course, you can even print it out and use it some interesting ways…like decorating a flier or a book cover. There are other maps generated by uses which you can use too. Map -> Image is very simple in execution and gives eye-catching results. Experiment with it a bit and tell us if it helped you jazz up your desktop. The above article may contain affiliate links which help support Guiding Tech. However, it does not affect our editorial integrity. The content remains unbiased and authentic.


![]()


